
In this howto we will show, how easy it is to add two factor authentication with OTP token to OTRS.
This is done for the support agents to protect support cases and customer data against attackers and misuse.
Nevertheless this can be done for the customers in the very same way.
Authentication will not be verified by OTRS anymore, but by privacyIDEA. The users are still taken from
the OTRS database. Also the same static password is used that the user was using before.
Prerequisites
We assume that you have a running installation of OTRS and privacyIDEA.
You might have followed the previous howto for the installation of privacyIDEA.
The User in OTRS
At the moment we have a few agents in OTRS. Their passwords happen to be “test”. They can login with just this password.

Define users in privacyIDEA
privacyIDEA always uses existing user stores. This can be flat files, LDAP directories, SCIM services or SQL databases. In this scenario we will tell privacyIDEA to look for the users in the OTRS database.
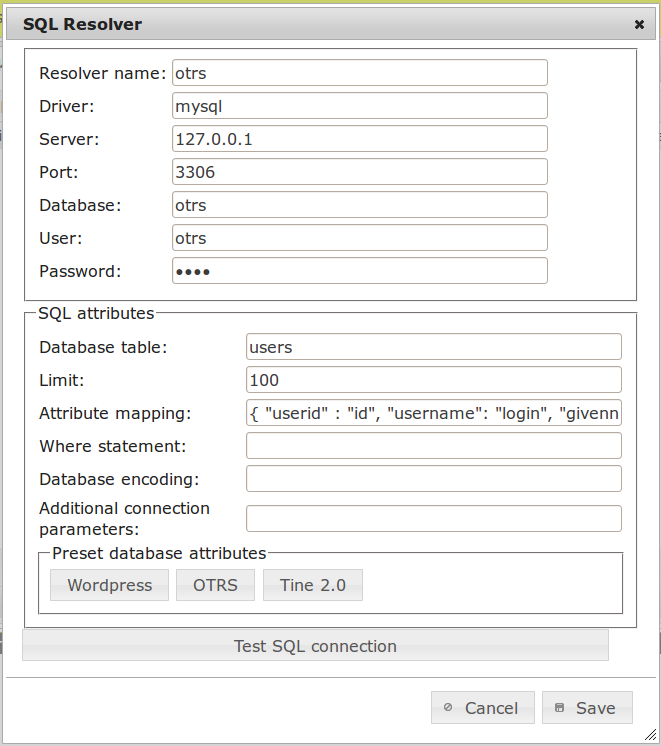
Go to privacyIDEA config -> UserIdResolvers. Click the Button “New” to create a new UserIdResolver. Choose “SQL”.
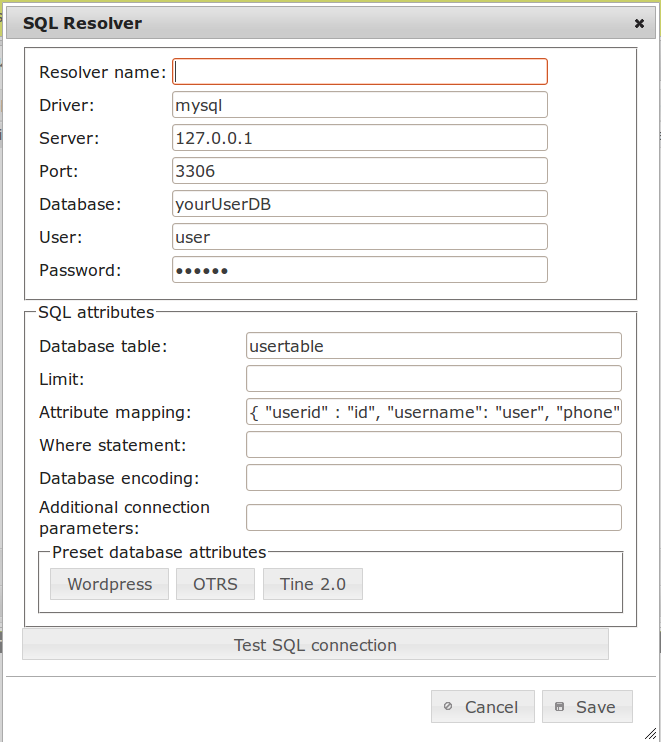
Here you can enter the connection definition to the OTRS database. To simplify the setup, there is a button “OTRS”, which will
set the default OTRS values in the “database table” and the “attribute mapping”. In most cases, you do not have to change this.
If the OTRS runs on the same machine like the privacyIDEA server, it might look like this:
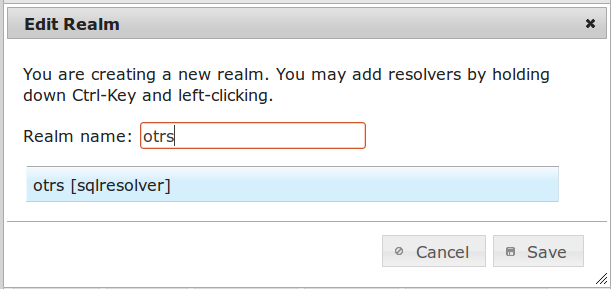
Several resolvers can be combined into a realm. So also this single new resolver needs to be put into a realm. If you save and close the resolver dialog, privacyIDEA will automatically take you to the realm dialog.
Create a new realm “otrs” and put the resolver you just created into this realm. The resolver will be highlighted in blue.
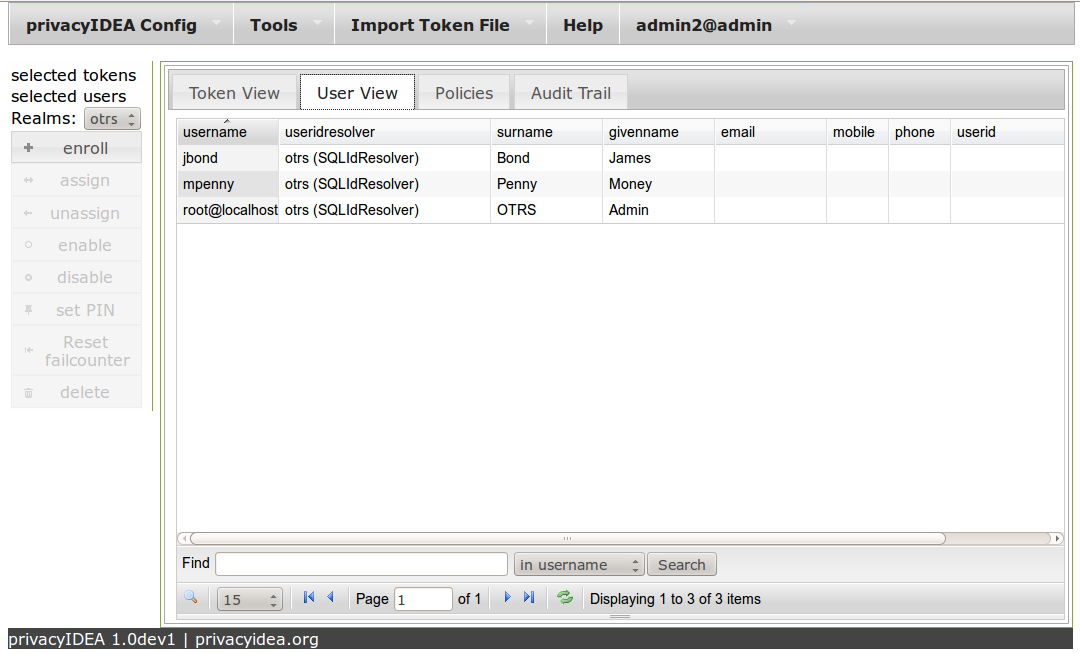
Save the realm and now go to the userview tab. You will now see all the agents from the OTRS database.
Enroll token to the user and test it
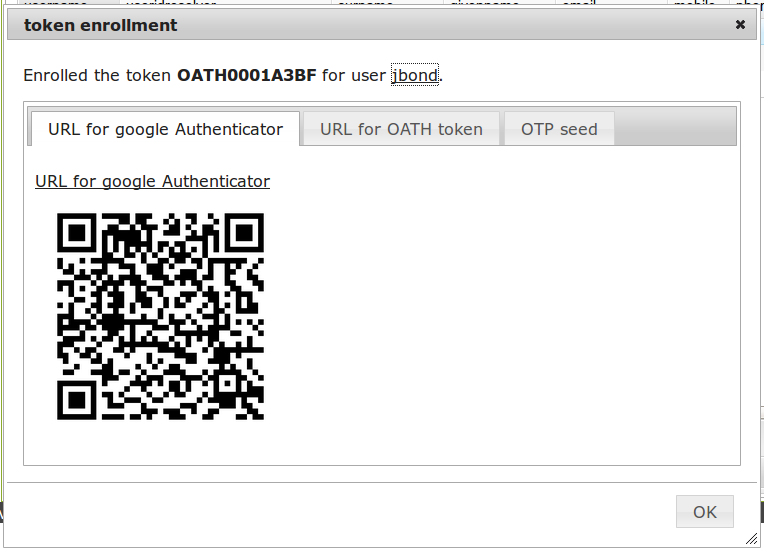
Now you can enroll or assign the token of your choice to the OTRS users. In this example I enroll a Google Authenticator. Select the user “jbond” and click the button enroll. Then the token to be enrolled will be directly assigned to the user “jbond”.
Choose “HMAC event based” and select “[x] generade HMAC key”. Then a QR-Code will be generated, that can be scanned with the Google Authenticator App.
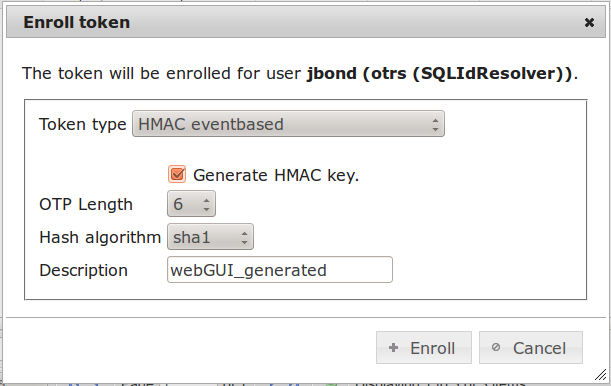
After enrolling the token you can set an OTP PIN for this token, I choose “1234”.
In the tokenview you can see the token, now.
Test authentication
You can point your browser to http://your.pricacyidea.server/auth/index and try to authenticate with the user (“jbond”) and the password “1234142371”, where “1234” is the OTP PIN I set during the enrollment and “142371” the OTP value displayed by the Google Authenticator.
You can view the successful authentication in the audt log.
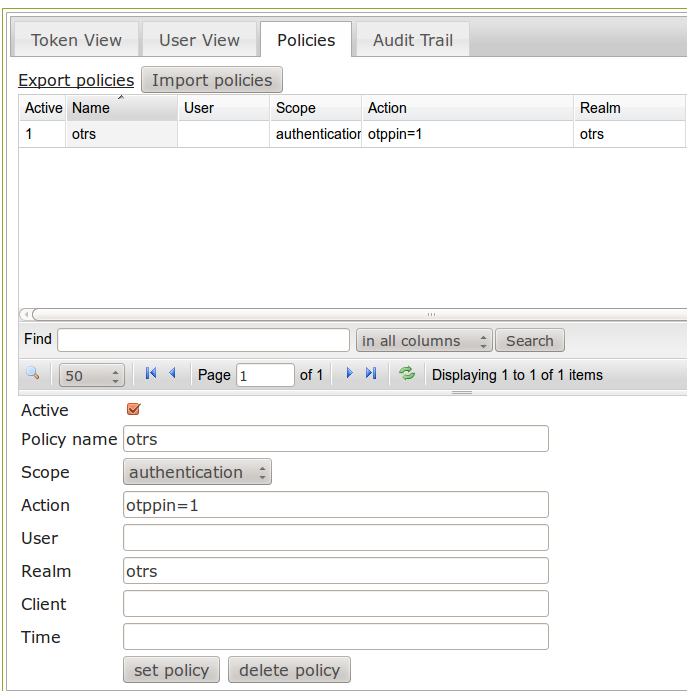
Don’t forget to mark the policy as active.
Again you can check the authentication but this time the user “jbond” needs to enter “test281707”. “test” being his original OTRS password.
Setting up OTRS
privacyIDEA comes with a OTRS authentication module that can be found here.
Copy this to your OTRS directory Kernel/System/Auth.
In your Kernel/Config.pm configure the following:
$Self->{'AuthModule'} = 'Kernel::System::Auth::privacyIDEA';
$Self->{'AuthModule::privacyIDEA::URL'} = "http://localhost:5001/validate/simplecheck";
Adapt the URL according to your privacyIDEA installation.
Now each agent logging in, needs to login with his OTRS password concatenated with the OTP value from his token.
Note: Also root@localhost will not be able to login without a token anymore.
Happy authenticating and secure supporting!
Questions? Answers!
For any requests join the google group or visit github.