
This blog will show how you can use privacyIDEA to secure your SSH login. In this case users need to provide an SSH Key and in addition an OTP token and an optional password.
Thus you have the following authentication factors:
- SSH Key (soft possession factor – copyable!)
- optional passphrase on the SSH Key, which is not controlled by the server! (knowledge)
- OTP token supported by privacyIDEA like Google Authenticator or preferable a Yubikey (hard possession factor – not copyable)
- an optional OTP PIN controlled by privacyIDEA (knowledge)
Connect SSH to privacyIDEA
Connecting SSH to privacyIDEA is described in this video. It uses the privacyIDEA PAM Module in the online documentation.
In the SSH configuration you need to set
UsePAM yes
This way SSH will authenticate the user against the PAM stack using /etc/pam.d/sshd.
This howto will assume you are using a Ubuntu system. Other systems like CentOS use slightly different PAM configuration, but the idea is the same.
Install privacyIDEA PAM
To use PAM with privacyIDEA you need the privacyIDEA PAM authentication module. On a Ubuntu 14.04 you can install it like
add-apt-repository ppa:privacyidea/privacyidea
apt-get update
apt-get install privacyidea-pam
In other cases you can get it from github with the above mentioned link.
Configure SSH PAM
Now lets take a look at the PAM config for SSH. The file /etc/pam.d/sshd contains a line
@include common-auth
Change this line to
@include common-auth-pi
By creating such a new file it is easier for us to add two factors to every PAM enabled service.
Copy the file /etc/pam.d/common-auth to /etc/pam.d/common-auth-pi. The file /etc/pam.d/common-auth-pi will look like this:
auth     [success=1 default=ignore] pam_python.so /lib/security/privacyidea_pam.py url=https://yourserver \
                                                  nosslverify debug
auth    requisite   pam_deny.so
auth    required    pam_permit.so
auth    optional    pam_cap.so
In the file common-auth-pi we replace pam_unix.so with privacyidea_pam. You need to specify the URL of your privacyIDEA server. If everything is working out fine, you can remove the debug parameter. If you have a trusted certificate you can remove nosslverify.
Please assure, that you are logged in to your system or that you have other mean to login like ssh keys. Modifying the PAM stack for SSH can result in not being able to login with a password via SSH anymore.
Now that you have configured
- /etc/ssh/sshd_config
- /etc/pam.d/common-auth-pi
- /etc/pam.d/sshd
you can restart the SSH server for the changes to take effect.
When you now try to login via SSH, the username and password will be sent to privacyIDEA for verification. You can not use you OTP PIN and Yubikey to login.
If you experience any problems, take a look at /var/log/auth.log.
If everything is working fine, you are now authenticating with:
- OTP token supported by privacyIDEA like Google Authenticator or preferable a Yubikey (hard possession factor – not copyable)
- an optional OTP PIN controlled by privacyIDEA (knowledge)
Add SSH Keys
You may realize, that if you have an SSH key in the authorized_keys you will not be asked for the OTP. At the moment you either login with SSH key or with OTP. Let’s change this now, that you can use SSH key and OTP.
The current OpenSSH comes with the options AuthenticationMethods. This is used to concatenate required authentication methods. See the man page of sshd_config for more details.
In the file /etc/ssh/sshd_config we add this line:
AuthenticationMethods publickey,password
This means that SSH will require that you pass a trusted SSH key and after this ask you for a password (PIN+OTP), which will be verified by privacyIDEA.
The login will look like this:
root@gawain ~ # ssh root@privacyidea
Authenticated with partial success.
root@privacyidea's password:
Welcome to Ubuntu 14.04.3 LTS (GNU/Linux 3.13.0-66-generic x86_64)
The “Authenticated with partial success” means, that the authentication with the SSH key succeeded. Now you need to specify the One Time Password to be sent to privacyIDEA.
Note: If you want to login as user “root”, be sure to add “PermitRootLogin yes” to your sshd_config.
Finally we managed to authenticate the users with:
- SSH Key (soft possession factor – copyable!)
- optional passphrase on the SSH Key, which is not controlled by the server! (knowledge)
- OTP token supported by privacyIDEA like Google Authenticator or preferable a Yubikey (hard possession factor – not copyable)
- an optional OTP PIN controlled by privacyIDEA (knowledge)
Manage SSH Keys with privacyIDEA
Wait! Are you still there? One thing might still strike you:
While all OTP tokens are centrally managed by privacyIDEA, users still put their public SSH keys on all the machines and you are wondering where the SSH keys of all the users are floating around.
There is no easy way for you to revoke a compromized SSH key.
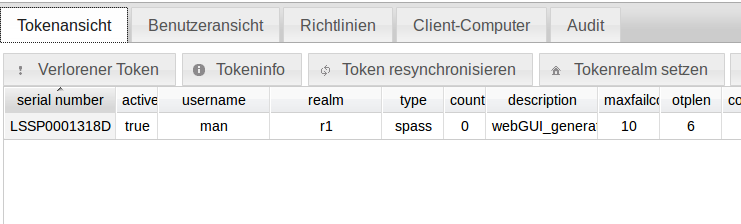
But you can also solve this with privacyIDEA. Users can upload their public SSH keys to privacyIDEA with the tokentype SSH Key.
This way you can also manage all SSH keys in privacyIDEA. In sshd_config you need to use the AuthorizedKeysCommand to retrieve the SSH keys from privayyIDEA just in time. Deleting an SSH key in privacyIDEA will deny access for this user immediatly.
You can read SSH Key Management with privacyIDEA to set this up.
This way you have three strong factors to secure the access to SSH.


One thought on “SSH Keys and OTP: Really strong two factor authentication”