
Today I am talking about how I am developing privacyIDEA and how it might be easy for you to participate.
A while ago I started using pycharm. There are many different IDEs out there. ![]() I also used Aptana and Eclipse for a while. But pycharm just feels a bit quicker and navigation in the code seem to me more intuitive. vim is no IDE to me. But everyone is allowed to do what suites him best. privacyIDEA is a project with several layers – database, libraries, dependencies and APIs. It helps me to be able to browse the code and “find usages” and “refactor” functions and variables.
I also used Aptana and Eclipse for a while. But pycharm just feels a bit quicker and navigation in the code seem to me more intuitive. vim is no IDE to me. But everyone is allowed to do what suites him best. privacyIDEA is a project with several layers – database, libraries, dependencies and APIs. It helps me to be able to browse the code and “find usages” and “refactor” functions and variables.
So, in this blog post I will show you, how you can set up the privacyIDEA project for development, running and debugging.
Get privacyIDEA
First get the privacyIDEA sources. You may as well first fork privacyIDEA into your own repository, so that you can commit changes and issue pull requests. We clone the repository locally and also setup a virtualenv, so that you have everything you need for development.
cd ~
git clone https://github.com/privacyidea/privacyidea.git
cd privacyidea
virtualenv venv
source venv/bin/activate
pip install -r requirements.txt
For pip install to run successfully, you might need to install additional development packages.
Get PyCharm
Go and get pycharm for your operating system. Follow the easy installation instructions on their website.
Setup privacyIDEA project
Now start pycharm and now we can set up the new privacyIDEA project.
Choose “Create New Project”. Select a “Pure Python” project with the Location of the folder, where you cloned the git repository.
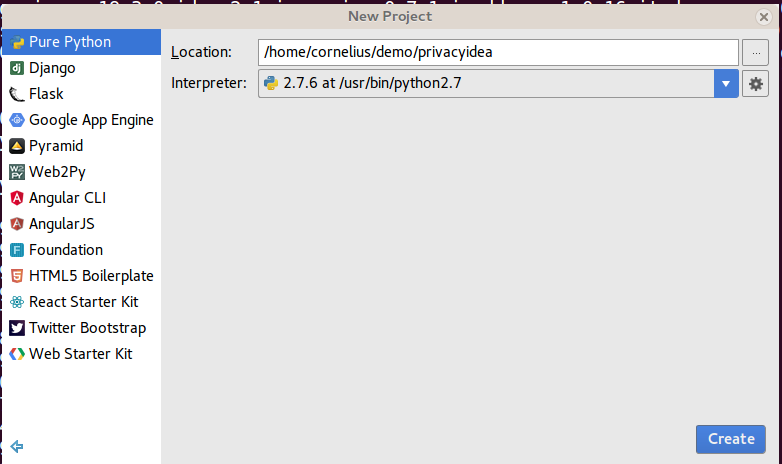
We need to change the Interpreter. We want to use the Python Interpreter from our virtualenv. So click on the gear icon next to “Interpreter”, choose “Add local Python Interpreter” and select the python binary from your virtualenv.
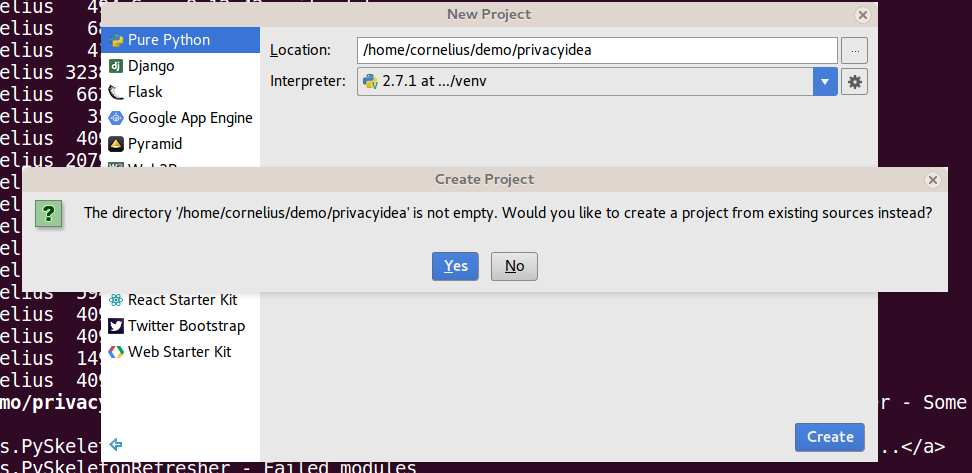
pycharm is now indexing the python code in your project. This may take quite a while.
Meanwhile we can…
Set up your local privacyIDEA
We are running and debugging privacyIDEA from within pycharm. We will do this on the current code we are developing. Thus we need to setup privacyIDEA. In the root directory of the project you will find the script pi-manage.
We need to create encryption and signing keys and also the local database “data.sqlite”. This configuration is read from the internal config in privacyidea/config.py.
./pi-manage create_enckey
./pi-manage create_audit_keys
./pi-manage createdb
./pi-manage admin add <yourAdminAccount>
In the last step we create the first token administrator. You may think of a name and provide the administrators password.
Create Run and Debug Configurations
When indexing is done, we can create Run and Debug Configurations. These configurations help you to run tests, run the privacyIDEA server and also debug these runs.
On the upper right corner is a drop down box, which is initially empty. Choose “Edit Configurations…”.
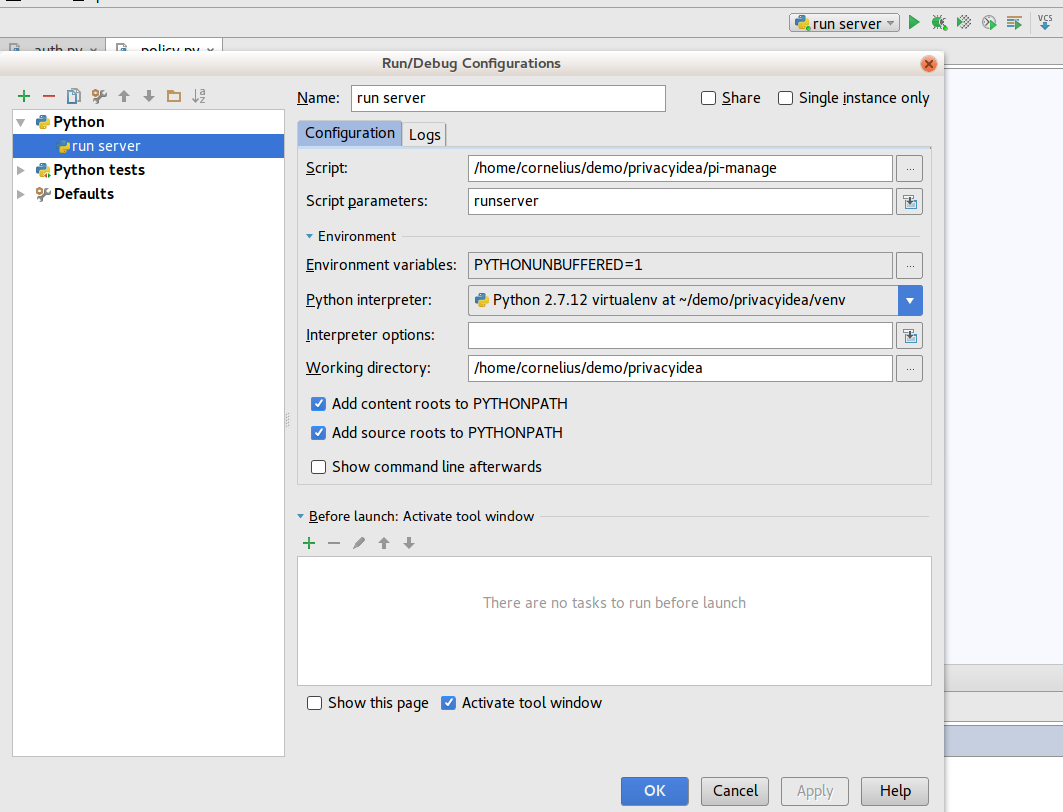
First we will create a pure Python configuration we might call “run server”. The server can be run locally also using the script pi-manage. Thus we enter “pi-manage” as the Script and “runserver” as the parameter.
Please assure, to select the correct Python interpreter. This one in our virtualenv!
Also choose the project root directory as working directory. This way we do not have to install the privacyIDEA python module, but can just run on the current code.
We also create a second configuration which we use to run all integrated tests.
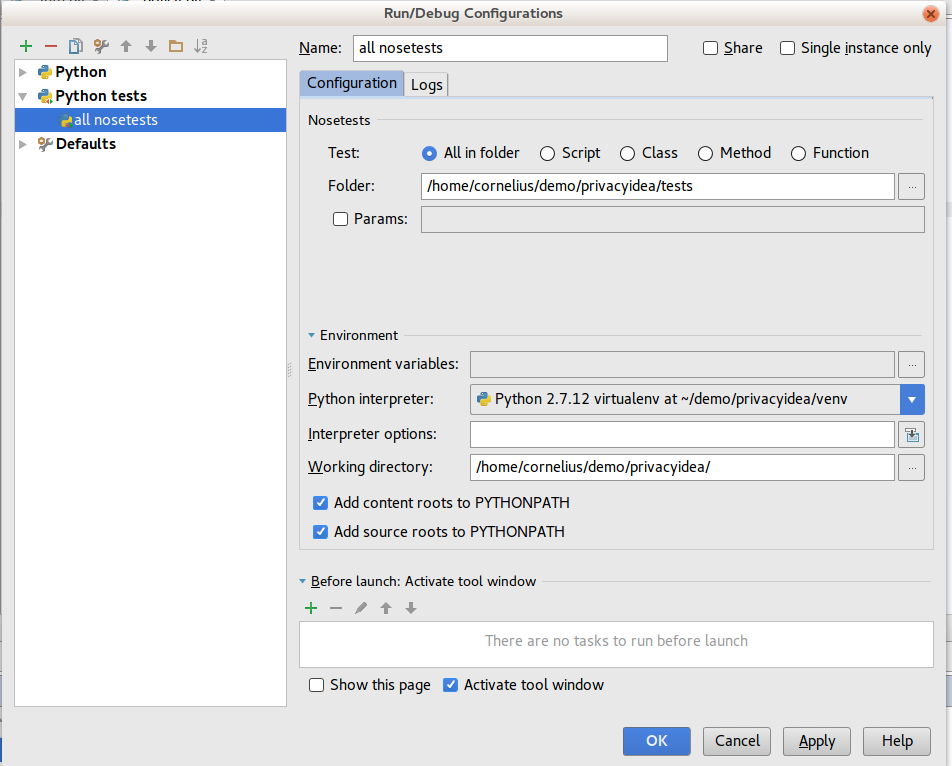
The test configuration lets us run all 700+ tests in the tests directory.
Run it!
Want to see, what I mean? Select the configuration “run server” and hit the green start triangle. pycharm will run privacyIDEA and it will listen on localhost:5000.
You can now navigate your browser to http://localhost:5000 and log in as the administrator, which you created earlier.
The Code
On the left side you can have different views like the project view (files) or the code structure of the current file.

There are many different ways to navigate the code and over time everyone will finds his preferred way. You can navigate via the tree views on the left, by navigating within the code by jumping the method and class definitions or by the breadcrumps above the main window.
Within the project you can also use Ctrl-H so search anything in the current sub folder.
privacyIDEA Code Structure
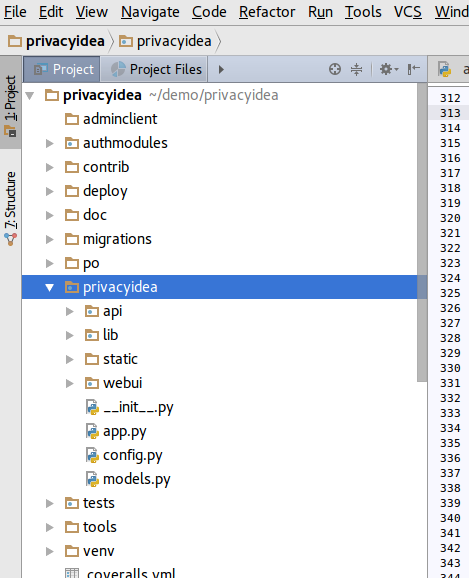
The basic structure in privacyIDEA looks like this:
You will find the database definition in privacyidea/models.py.
All library functions, which operate on the database are located in privacyidea/lib/. The REST API of the privacyIDEA server is defined in privacyidea/api/.
privacyidea/webui/ contains the jump in point for the UI. The privacyIDEA WebUI is implemented as a AngularJS Single Page Application. All this can be found in privacyidea/static/.
Debug it!
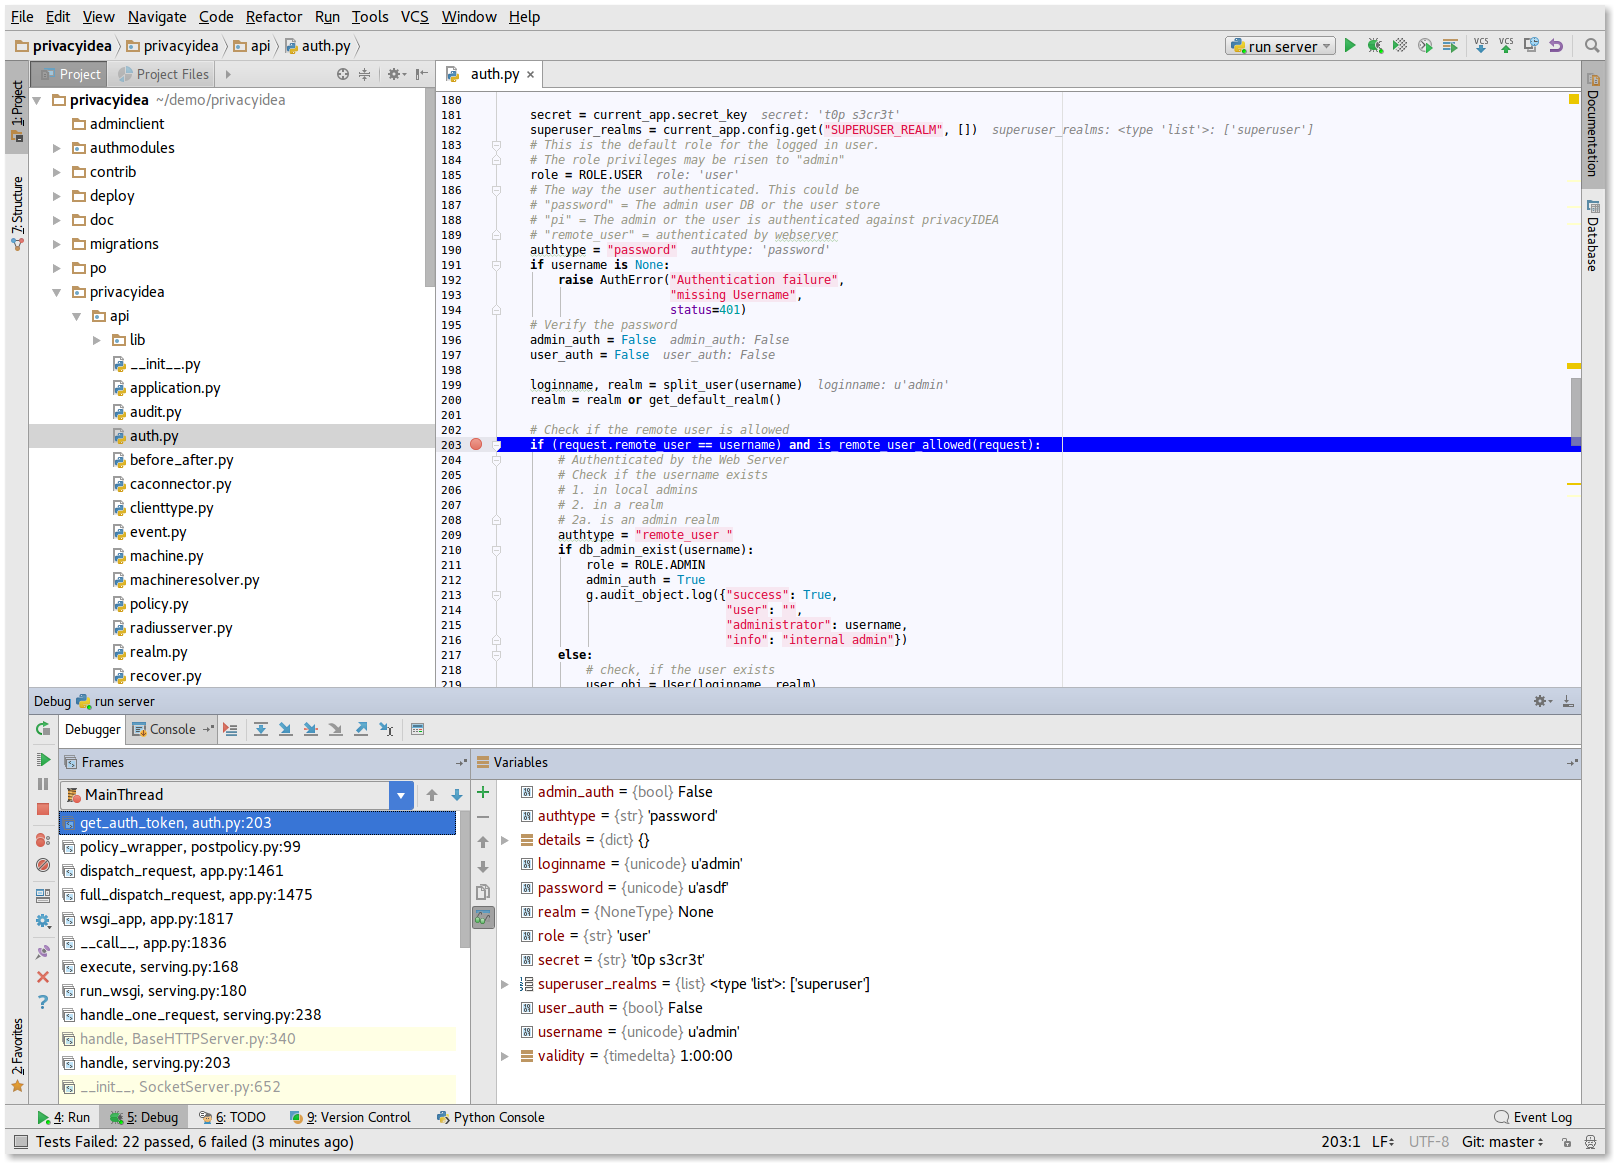
You may also select the configuration “run server” and hit the debug button. privacyIDEA will be started and listen on port 5000. But this time you can set breakpoints and step through the code. In the above example we set a breakpoint in the REST API /auth/ which is called when a user is trying to login to the WebUI. This way we can stept through the login process and monitor all variables.
Fork it!
I very much hope you liked this short introduction and it helps you to better understand the internals of privacyIDEA or to get started with privacyIDEA development. So go and fork privacyIDEA at github, get your pycharm, add new features and issue your pull requests!
